🔧 Seal the deal with Electrolux precision – don’t let leaks cramp your style!
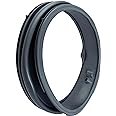
The Electrolux 134616100 Door Boot Seal Bellows Kit is a genuine, certified frustration-free replacement part crafted from durable polyester and fiberglass. Measuring 19x19x4 inches, it guarantees a perfect fit for compatible Electrolux washing machines, ensuring optimal performance and long-lasting reliability. Designed for experienced installers, this kit embodies Electrolux’s commitment to quality and appliance longevity.

| UPC | 012505473579 724519901039 |
| Brand Name | Electrolux |
| Model Info | 134616100 |
| Item Weight | 2 pounds |
| Product Dimensions | 19 x 19 x 4 inches |
| Country of Origin | China |
| Item model number | 134616100 |
| Is Discontinued By Manufacturer | No |
| Part Number | 134616100 |
| Certification | certified frustration-free |
| Material Type | Polyester, Fiberglass, Plastic |
| Batteries Included? | No |
| Batteries Required? | No |
P**L
Perfect match for Electrolux EWFLS70JIW0
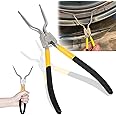
This is an authentic Electrolux part and appears to be very well made. It comes in a real Electrolux bag and the part number matched expectations. It was an exact match for the one on our Electrolux EWFLS70JIW0 washer and fixed our door leak from the old bellows being worn out. Install was not very difficult and took about an hour, or two hours if you include time spent contemplating the insides of your washer.I chose to replace the retention springs as well. For my washer listed above this was: Frigidaire 134616200 for the big inner spring which attaches the gasket to the drum and 134616300 for the outer spring which seals the gasket to the front panel. Compared to the labor, these parts are inexpensive and you'll have access to do so at installation time.Importantly -- you do not need a spring installation or removal tool to stretch the outer spring. It's fairly easy to do with just your hands and needle-nose pliers (two pairs of hands helps). No special purpose spring-stretching pliers are required and if you research their maximum opened capacity you'll find that most of them are in fact not large enough to stretch this particular spring far enough open to get it on, so safe your money and just do it by hand. The inner spring is a lot more substantial and is best done by hand with gloves on so you don't pinch your skin.You will find people complaining about the difficulty of installing the rubber "bellows" gaskets online, but when you dig deeper you find that the people who say this are choosing to install it without disassembling the washer! That's a sure way to struggle through the process and hurt your knuckles trying to wrestle this huge rubber gasket into the small crack between the stationary drum and the front panel of the washer. This is the wrong way to install it.Instead, just disassemble the washer to get access to the gasket and it will be a lot easier and not frustrating at all to get it on -- after all, a human installed this same gasket on the drum in the factory, and they definitely did not squeeze it through the gap formed with the front panel. The only tools you need to disassemble to the point of easy access are: a screwdriver, a socket set, some work gloves, and some needle nose pliers.Disassembling the washer you'll also learn something and not just spend the time struggling to wrestle a pice of rubber onto a plastic drum and a big retention spring onto the rubber. For one thing, you'll learn if your washer has any leaks internally -- because you'll see them on the bottom panel and front panel. You will get to see fun things inside your washer like the concrete-filled stabilizing weights which are attached to the front of the drum; and the fact that the whole drum with its pump is suspended in mid-air with long springs to isolate vibration during the spin cycle. You will remove the front and top panel as well as these weights to access the bellows unencumbered. Do not be afraid -- you just bolt everything back in the same way that you unbolted it. If you can use basic tools and remember how things went together, then you will probably be fine.There are videos for the disassembly that you can watch. My recommendation is that you don't watch any video where the presenter tries to squeeze it on without removing the front panel of the washer to actually access the outer drum where the bellows is attached. That approach is not the right way to do it -- in addition to being physically more difficult, it's also impossible to see if you have seated the bellows correctly on the drum, and to see if you have seated the big retention spring correctly on the gasket.
B**K
Tricky to install. Works best with 2 people, lots of youtube videos for help.
Installed on Electrolux washer, works like new now. Springs are tricky to get back on but with the help of a clamp and some youtube videos was able to do it. Works best with 2 people as the drum will move as you try to stretch the spring back into place. One person can stabilize the drum and the other can stretch the spring into place.
A**R
The right product to repair a leaking door seal, but it's not an easy job
Our 2-year old washer started to leak when we had full loads and I found tears in the original door boot. Wear and Tear from heavy loads the warranty people said, so I ordered this part for the DIY repair instead of paying for the repair.-Took me about 90-minutes to replace the boot, and there are no problems now.-Part fits fine in every way, looks like identical quality to the original one.This should be considered a difficult / advanced DIY job. Taking the old boot out was not hard, but getting the new boot seated properly and especially the spring retainer band back in took a lot of care, effort and rigging. Someone could get hurt or damage the new boot if they are not careful with the spring retainer installation.
C**Y
Good Product, difficult install
This took me an hour and 15 minutes to remove and install. I am a very mechanical person and it was not easy. It wasn't that it was difficult to figure out how to install but instead the physical leverage required of your fingers to work the rubber around the metal rim, then stretching the snap ring and spring retainer back into place. I would imagine that there are specific tools the manufacturer has for this installation. It's definitely possible to install this yourself but be prepared for some trial and error that will likely result in frustration before you finally succeed! I recommend having a second set of hands when installing the spring retainer as that was the most difficult part. Apart from the install, it fits great and does it's job!
A**S
Bad choice
Poor fit. Have to get another.
J**Y
Happy with washing machine Seal
Perfect in every way
T**L
Very Difficult to Install
Purchasing and installing this bellows will save you lots of money, but beware, the installation is VERY difficult. This bellows was for my front-load washer. The one I had was 14 years old and had mold on it. My wife was very concerned about cleaning our clothes in a washer that had mold. I watched all the YouTube videos on how to replace it. None of them prepared me for the level of difficulty.Here is how I finally completed the task.1. Remove the retainer spring that holds the bellows on the front panel and pull the bellows off the front panel.2. Remove the front panel.3. Remove the spring that holds the bellows on the tub (moderate difficulty).4. Remove the bellows.5. Install the new bellows on the tub - high level of difficulty getting it lined up correctly and properly inserted on the tub. Lots of pushing and pulling to get the bellows lip properly in the slot on the tube.6. MOST DIFFICULT - install the retaining spring on the bellows. You HAVE to HAVE 3 or 4, 3" spring clamps to hold the spring in place as you work it around the tub. Also, suggest gloves as you have to stretch the spring a little bit at a time around the tub and on the bellows. Use the spring clamps to hold the spring in place moving them around the tub as you make progress.7. Replace the front cover8. Install the bellows on the front panel. Once again lots of pushing and pulling as you push the lip of the bellows into the slot on the front panel.9. Reinstall the retaining ring on the bellows.10. Celebrate!
J**E
meets spec's and cheap
I normally am the handy man around my place. When the wife bought it to my attention that the washer needed a repair I looked around and found this gasket for a fair price compare to other vendors. The product arrived on time in good order. I installed it with much concern. I did need help stretching the band to fix the gasket in place. all in all it was pretty simple. If we ever need another one I will purchase it from here.
Trustpilot
1 month ago
4 days ago